Done and Dusted!

Finally, my front garden project is complete! Now all that is left to do is to see what survives and what dies and deal with these outcomes accordingly.

Aunty Peta (and I) decided on a magnolia tree to be the centre piece of the garden. It took a lot of time, effort and money on her part but she finally settled on a lovely little Teddy Bear magnolia which is a dwarf variety and should suit the location well. Aunty Peta dropped it off whilst I was at work one day. Thanks Aunty Pete!

The magnolia is the one on the left!

With the threat of a ridiculously wet period upon us, Aunty Peta said I had to get it in the ground toot sweet! She was a bit worried that I wouldn’t be able to accomplish this task on my own but after giving me copious instructions and me reassuring her that this has been covered on previous episodes of Gardening Australia which I watch every Friday specifically to learn this stuff, she relented and allowed me to proceed alone.

Nailed it!

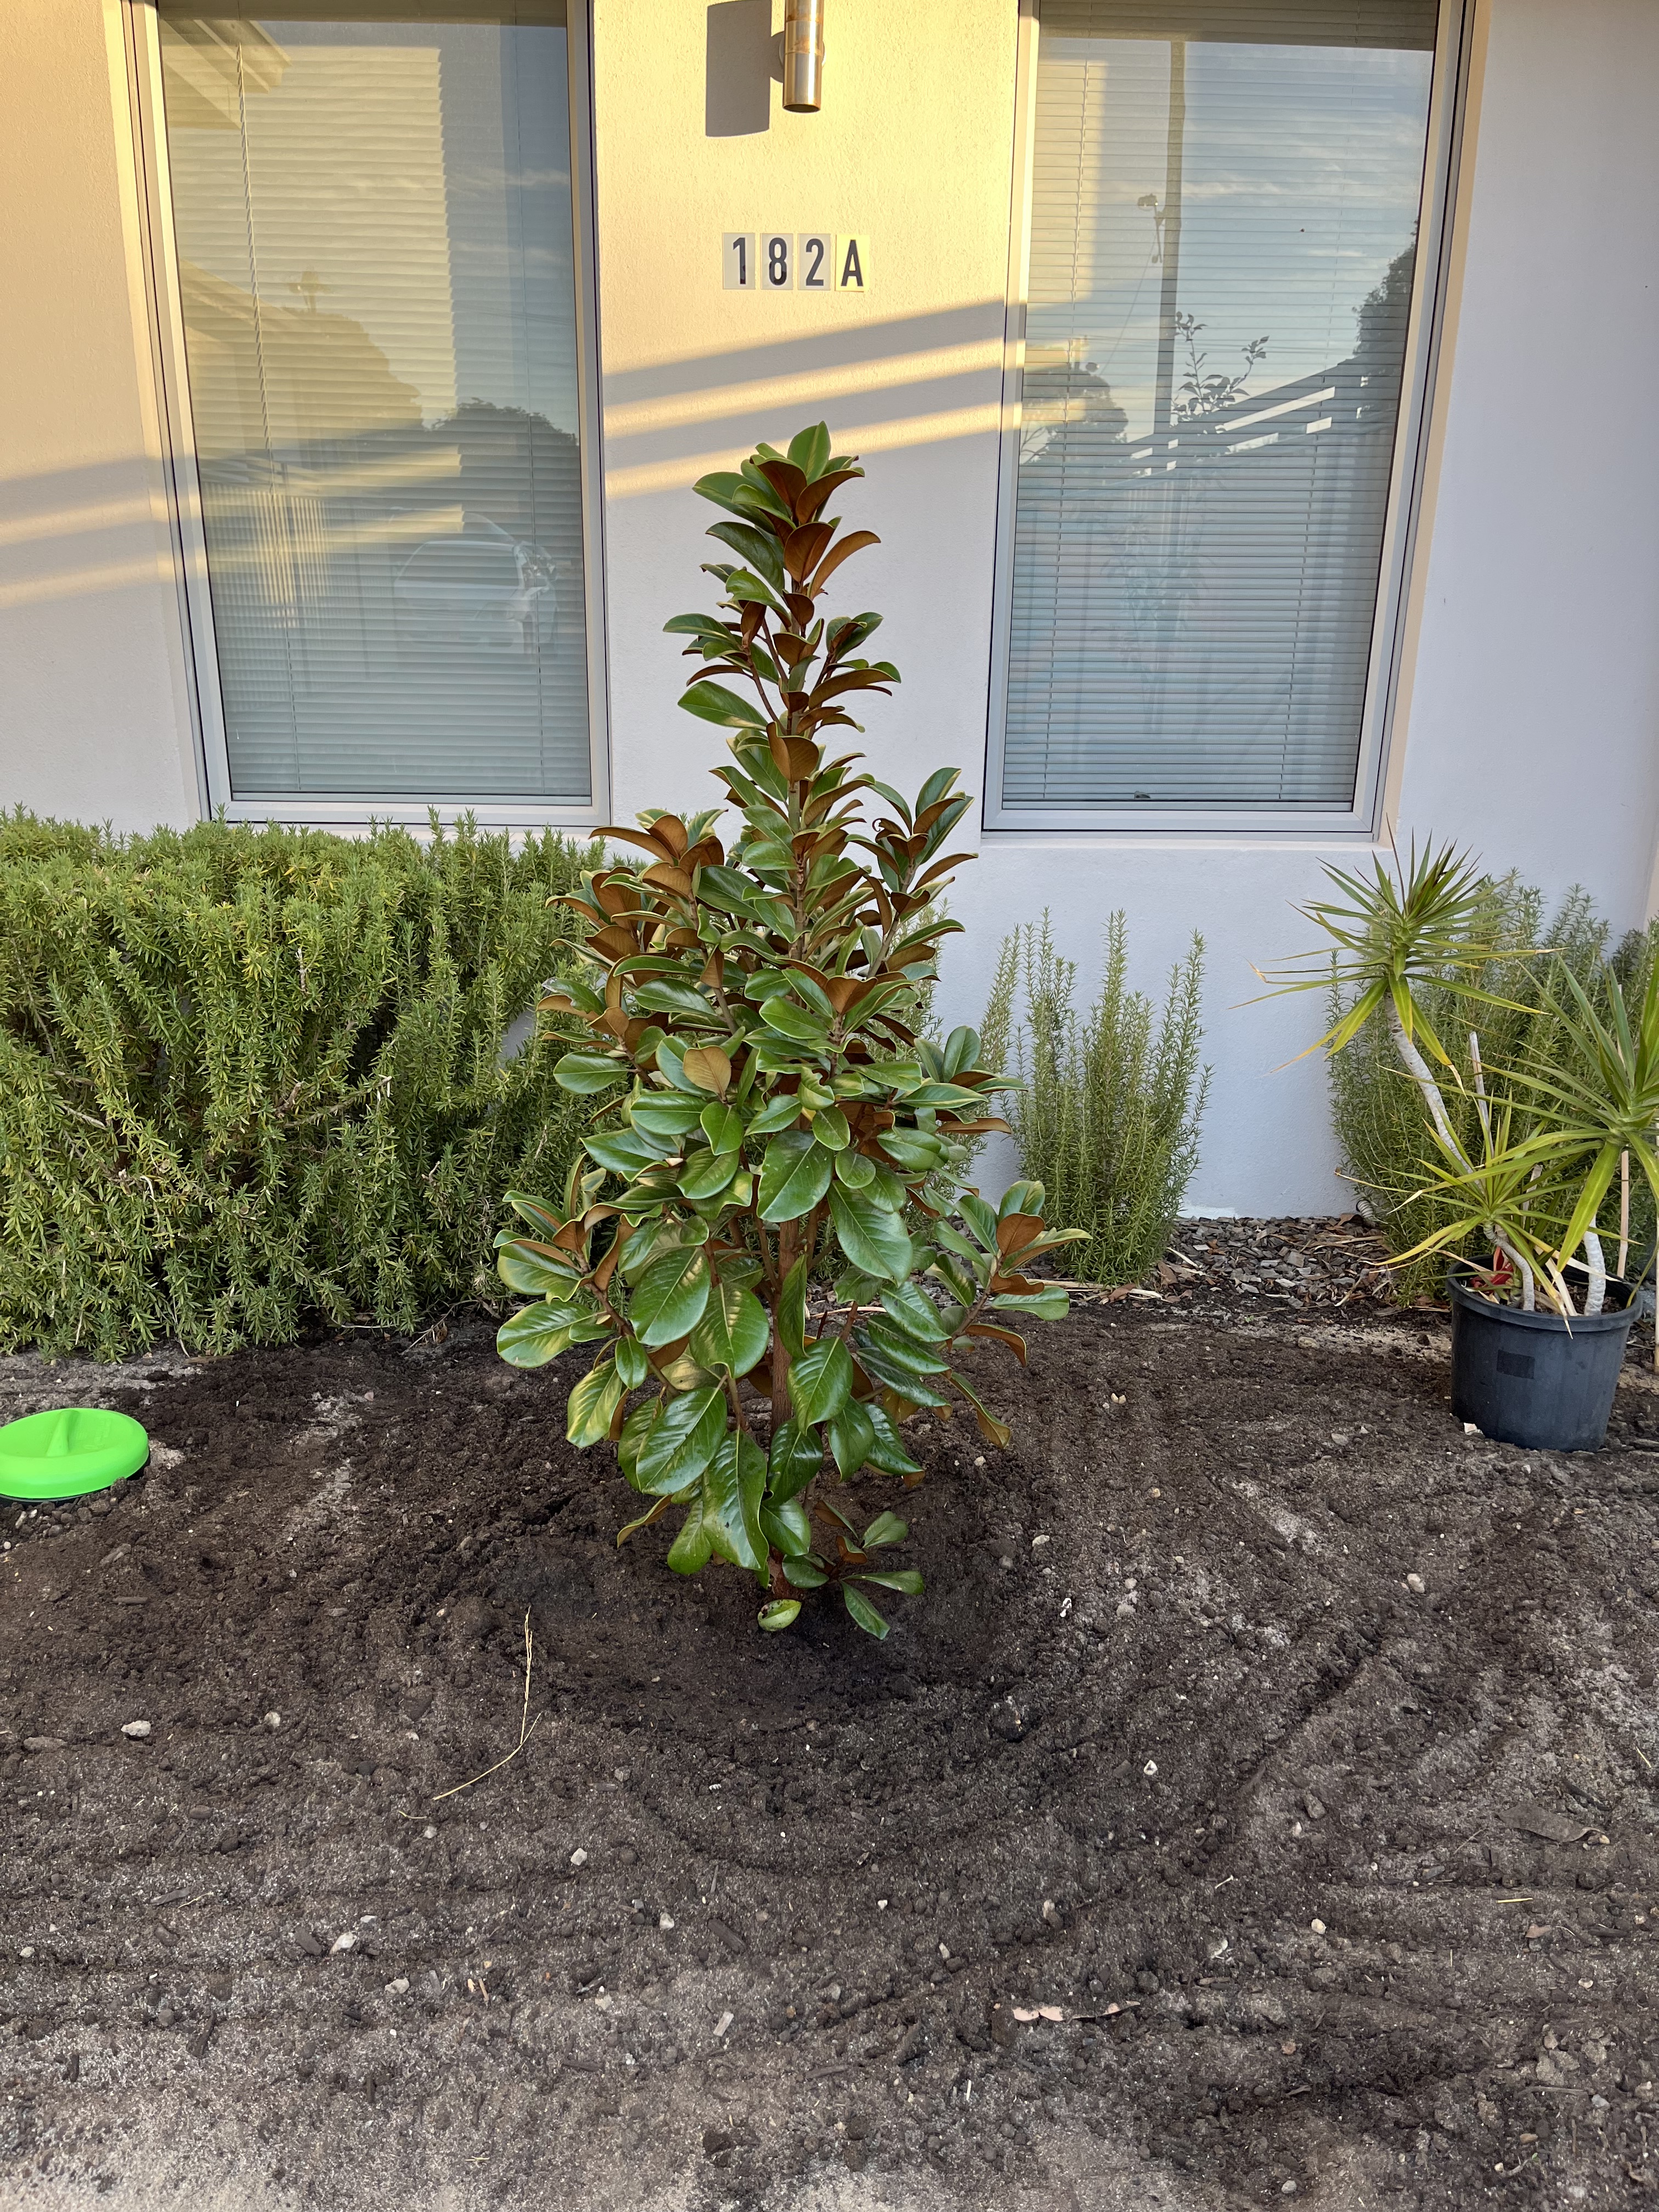
Today I took advantage of the mostly dry day to finish off the garden with some ground cover plants, a stepping stone to the worm farm and the mulching. I’m very pleased with the outcome.

Now to see what survives and what doesn’t!

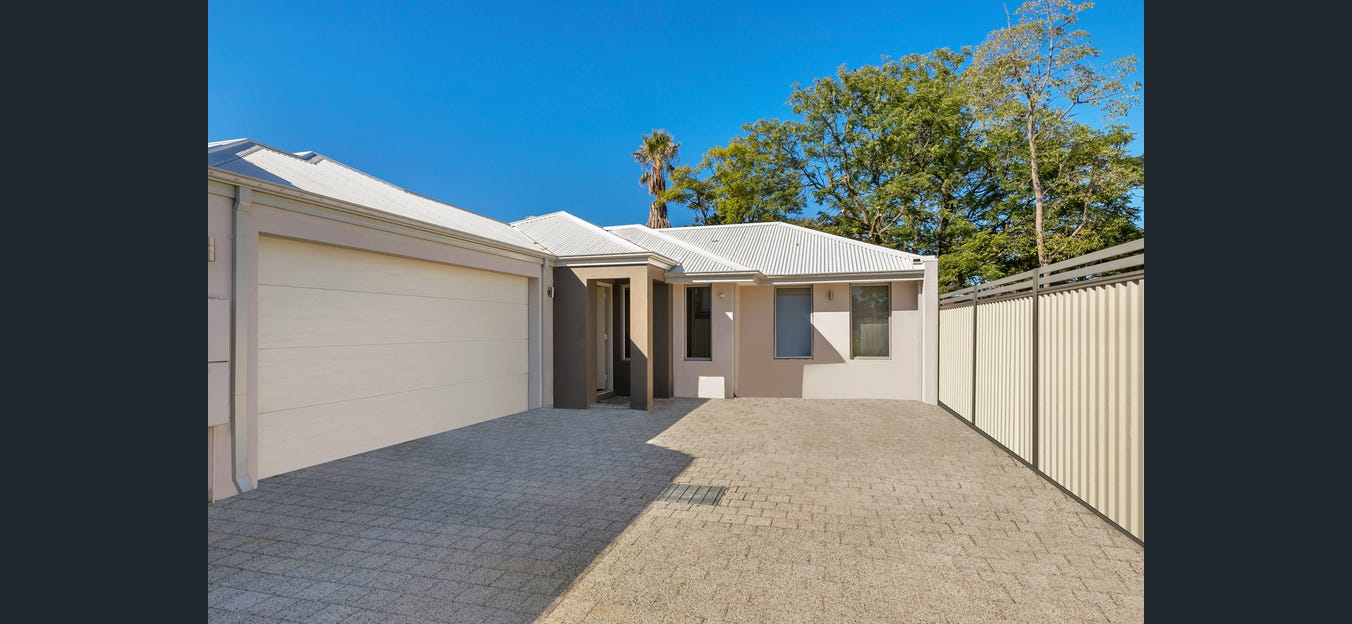
Here is the prospect down the drive of my house when it was first built followed by what it looks like now. Have I added value? You decide!

For reaching the end of my front gardening journey, here is a little treat. The day I planted the magnolia, Terri came round because I needed to get on the roof again to do some repairs before the rain started. She didn’t laugh at me this time but she did something else. Enjoy!

Check out my hole!

Forget going to the gym. If you want a full body work out, dig a hole. Dale was on to something.

It took me two days to dig my hole and it was not the simple exercise I had initially envisioned.

Firstly, I needed to borrow some equipment so I asked Terri if I could borrow her wheelbarrow and garden fork. She informed me that the tyre on the wheelbarrow was flat so I asked if she could kindly inflate it for me.

On Saturday morning, she dropped the wheelbarrow and garden fork around and told me that they tried to inflate the tyre but it was completely shot. She said it was still usable though but I may have to limit how much I put in the wheelbarrow at a time. I wheeled the barrow into position and it felt alright. I half filled it and discovered that this made it as imovable as a ten tonne block of concrete.

So off to Bunnings I went. Three trips to Bunnings at two different locations later, I had a new wheel to fit the existing wheelbarrow and I was ready to start digging!

Unfortunately by this time I was already pretty much over it and it was the middle of the day so the sun was out in full force. After digging four wheelbarrow loads out, I was sweating from my eyeballs and exhausted so I gave up for the day. I realised that this job was not as simple as I thought it was going to be.

Later that evening, Nicole came around to inspect my progress. She was not impressed. She was correct in her assessment.

The next day, I got a much earlier start with a fully functioning wheelbarrow, or so I thought. Two loads in and I decided to orient the wheelbarrow in the opposite direction for filling. This meant taking a right hand turn with the fully loaded wheelbarrow.

The rusted and bent old leg buckled further and the whole barrow toppled spilling its contents over my beautifully kept drive. In order to right it again, I had to empty the entire thing and then use the garden fork as a crowbar to bend the buckled leg back into place. As a further precaution, I made a mental note to avoid right hand turns.

Progress was difficult but I managed a much faster pace and was able to work for some time in the shade so by 11am, I had removed all the road base and was down to sand. My hole was complete! Standing beside my hole, I felt a deep sense of personal satisfaction at my achievement. No wonder Dad was so proud of Dale!

Now for the next steps to finishing the garden bed…

  1. Purchase a soil improver. How much? Who knows! Perhaps two cubic meters?
  2. Dig out a bunch of the sand and combine it with the soil improver to build up the garden bed.
  3. Cut back and tidy up existing rosemary.
  4. Purchase and plant a dwarf magnolia.
  5. Embed a worm farm in the corner.
  6. Plant the remaining space with other small flowering plants or ground cover.